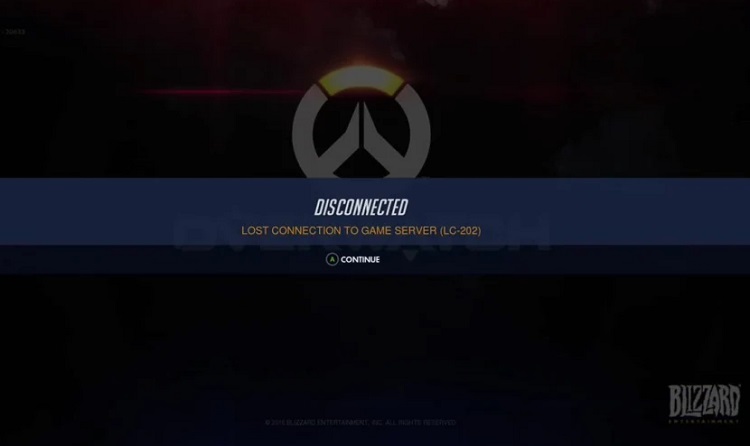
Are you an Overwatch player? Is your Overwatch connection getting lost these days? Don’t worry; this is the most common issue faced by the Overwatch players these days. Just read the particular article to know what you should do in such circumstances to get this problem solved.
You need not try every fix given below, but just initiate from the Fix 1 and go below trying various Fixes until you find the appropriate solution for it.

Contents
- 1 How to Fix Overwatch Lost Connection to Game Server Error
- 1.1 Method 1 – Reboot Your Network
- 1.2 Method 2 – Update Your Network Driver
- 1.3 Method 3 – Run Blizzard’s Battle.net Looking-Glass
- 1.4 Method 4 – Reset Winsock data
- 1.5 Method 5 – Flush your DNS and Renew your IP
- 1.6 Method 6 – Avoid Wireless Interference
- 1.7 Method 7 – Disable the Proxy Server
- 1.8 Method 8 – Change the DNS server
- 1.9 Method 9 – Close Bandwidth Hogging Applications
- 2 Conclusion
How to Fix Overwatch Lost Connection to Game Server Error
Method 1 – Reboot Your Network
As per the reports of multiple users, it was found that the problem gets merely solved by rebooting your PC as well as the network. The rebooting of the network will help in restoring the internet connection speed. What you need to do for rebooting the network is described in the following steps.
- First of all, switch off your modem as well as a wireless router.
- Once 60 seconds have passed, switch ON the network devices again.
- Now, let the indicator lights in the modem appear back.
- Finally, open the Overwatch game.
Check if the problem facing has been resolved. Henceforth, following all the steps carefully will solve your queries. If the issue has not been resolved, then step up to another method, i.e., Fix 2.
Read Also:
Method 2 – Update Your Network Driver
Is the network drivers in your PC updated? Or don’t you have any network drivers at all in your PC? If not, then we suggest you install or update them as this might also be the reason for the problem.
- First of all, open your favorite browser.
- Now, go to the manufacturer’s website.
What you need to do next is to find the current driver, which is perfect for your network adapter.
Important: You need to choose the driver to be updated with extra caution. In case you installed the inappropriate network adapter model, which is not suitable for your Windows version, then your PC will run in a problem.
Examine if the issue has been sorted out. We hope that the error might have been fixed until now. If your error has not been resolved till now, we suggest you try Fix 3.
Method 3 – Run Blizzard’s Battle.net Looking-Glass
Do you know anything about Blizzard’s Battle.net Looking-Glass? It is a network diagnostic tool that tests the server connection of your PC. Certain steps will help you in running this tool.
- First of all, go to Blizzard’s Battle.net Looking-Glass.
- Now, choose your region as well as the service, i.e., Overwatch, from various options available.
- Further, tick all the testing items.
- Finally, press the Run Test button.
Have you got any errors in the test run? It is suggested to provide a detailed report of the test results on the official forum of Overwatch. The official forum of Overwatch is a community of similar people who use Overwatch.
Someone on the Overwatch forum will definitely help you in getting rid of your problem. Is the problem of Overwatch connection to the game server fixed now? If not, we suggest you try the Fix 4.
Method 4 – Reset Winsock data
A supporting program and programming interface for Windows operating system is known as Winsock. The accessing of network services by Windows network software is explained by it. There occurs a few circumstances in which the Winsock data proves to be harmful to the PC. Hence, you must try resetting it to get rid of this issue. Don’t know how to reset? Just follow certain steps.
- First of all, open the search bar on your PC.
- Now, you need to type cmd in the search bar.
- Once you found the command prompt, choose Run as administrator after right-clicking on it.
- What you need to do next is to run the command prompt by granting permission to it.
- Further, press Enter after typing the certain command.
netsh winsock reset
- Finally, reboot your PC.
Once the PC is rebooted, open Overwatch and inspect if the connection is being established now between Overwatch and the game server. In case it is not able to make a connection even now, try out the Fix 5.
Method 5 – Flush your DNS and Renew your IP
The issues in DNS or IP can also be the supreme cause of the lost connection between the Overwatch and the game server. Hence, this issue can be solved by flushing out the DNS and renewing the IP. The respective steps can be followed by the user for flushing the DNS.
- First of all, open the Run dialog box by pressing Windows and ‘R’ keys simultaneously.
- Once it is opened, type cmd in it.
- Now, open the command prompt in administrator mode by pressing Ctrl, Shift, and Enter keys simultaneously.
- Further, grant the permission it is asking from you.
- Later on, run the Command Prompt by selecting Yes.
- Finally, press Enter after typing the certain command.
ipconfig /flushdns
You can renew the IP of your PC by performing the following steps.
- First of all, open the Run dialog box by pressing Windows and ‘R’ simultaneously.
- Once it is opened, type cmd in it.
- Now, open the command prompt in administrator mode by pressing Ctrl, Shift, and Enter keys simultaneously.
- Further, grant the permission it is asking from you.
- Later on, run the Command Prompt by selecting Yes.
- Moreover, press Enter after typing each command given below.
ipconfig /release
ipconfig /renew
Once you are done with both of the methods, open the Overwatch again, and examine if the issue has been resolved. In case it fails to solve the problem even, step-up to another Fix.
Method 6 – Avoid Wireless Interference
Does the connection between Overwatch and the game server gets lost when you try to connect your PC to the Internet? This case only occurs when there is a problem with wireless interference. For avoiding wireless interference as well as improving the Wi-Fi signal, follow the below-mentioned methods.
- Locate your router at a place where most of the signal comes, such as the house’s center. This is done in order to get a better Wi-Fi signal.
- Either switch OFF the wireless devices like microwave ovens, cordless phones, etc. or take them away from the router.
Is your problem not even solved by avoiding Wireless Interface? If not, then we recommend you step up further towards Fix 7.
Method 7 – Disable the Proxy Server
Are you using a proxy server on your PC? If yes, then we might tell you that the proxy server also leads to the lost connection. You can follow the following steps for disabling the proxy server.
- First of all, open the Run dialog by pressing Windows and ‘R’ keys simultaneously.
- What you need to do next is to press Enter after typing the following command.
inetcpl.cpl
- Now, open the Connections tab. S
- Then, choose Never dial a connection, which is present below the Choose Settings option.
- Further, select LAN settings.
- Moreover, deselect the checkbox of Use a proxy server for your LAN.
Important: Is the checkbox of Use a proxy server for your LAN already deselected? In such circumstances, also deselect the checkbox of Automatically detect settings.
- Finally, press the OK button.
If you have any VPN or a third-party proxy server installed in your PC, then also disable it for a while. Now, inspect if the issue forthcoming has been rectified. In case disabling the proxy server cannot resolve the problem, try using the Fix 8, i.e., of changing the DNS server.
Method 8 – Change the DNS server
Is your issue not solved by anyone of the fixes given above? You might be knowing that every PC has it’s own DNS server. Also, this DNS server leads to cause the issue in some cases. Thus, switching your PC’s DNS server to a speed boost and security-enhanced server, Google Public DNS can solve your problem. Certain steps could be followed.
- First of all, open the Run dialog by pressing the Windows and ‘R’ keys simultaneously.
- What you need to do next is to type control in the dialog box.
- Then, open the Control Panel by pressing the Enter.
- Now, sort the Control Panel according to the Category.
- Further, select View network status and tasks. It will pop-up the window.
- Later on, choose Change adapter settings.
- Moreover, choose Properties by right-clicking on the current network.
- The next step includes viewing of properties by double-clicking on the Internet Protocol Version 4.
- Choose Use the following DNS server addresses after selecting the option Obtain an IP address automatically.
- You need to enter certain commands in the respective text boxes.
Preferred DNS server > Google Public DNS address: 8.8.8.8
Alternative DNS server > Google Public DNS address: 8.8.4.4.
- Next, save the changes by pressing the OK button.
- Finally, open the Overwatch after rebooting your PC.
Is the problem of connection between the Overwatch and the game server fixed now? If not, we suggest you try Fix 9 which will definitely solve Overwatch Lost Connection to Game Server problem.
Method 9 – Close Bandwidth Hogging Applications
Are you using any Internet consuming application and watching TV shows simultaneously? Didn’t get, which applications are we talking about? We are talking of applications similar to Dropbox, OneDrive, iCloud, etc. What happens in such a situation is that the bandwidth issue occurs due to which the connection between Overwatch and the game server loses. The only thing which will help you in resolving the issue is closing all such applications. The following steps will help you.
- First of all, open Task Manager by pressing Ctrl, Shift, and Esc keywords simultaneously.
- Now, choose the End Task option after right-clicking on the above-mentioned applications.
Now, initiate Overwatch and check if you are able to enjoy the game without interruption. The Overwatch Lost Connection to Game Server error message will not appear for sure if you followed all the above steps fruitfully.
Read Also:
Conclusion
We hope that the above-mentioned solutions might have solved Overwatch Lost Connection to Game Server issue. In most of the cases, the problem gets solved either by rebooting the network or updating the network drivers.
However, if it fails to do so, the above-mentioned various methods will definitely solve your problem.


