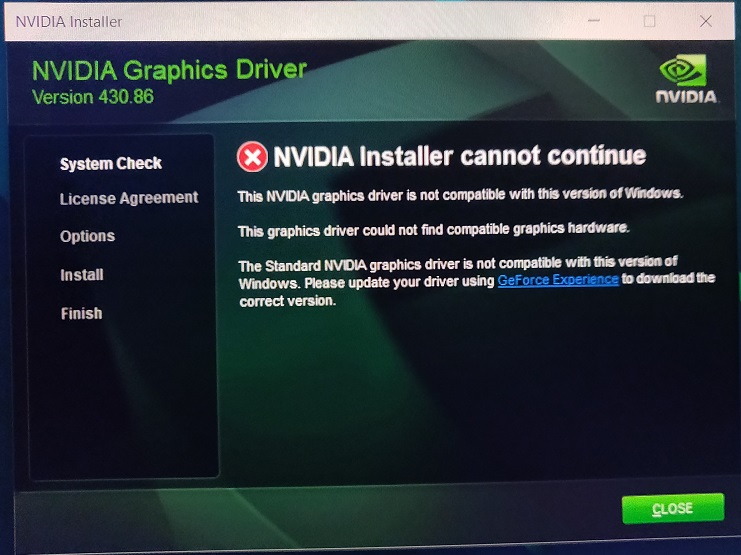
Are you facing NVIDIA display settings are not available? Don’t worry. It is the most common issue which is faced by numerous users. It usually occurs if you have a faulty graphics card driver in your PC or there are missing updates or registry subkeys and values.
Contents
- 1 How to Fix NVIDIA Display Settings are Not Available
- 1.1 Method 1 – Restart NVIDIA Services
- 1.2 Method 2 – Manually Launch NVIDIA Control Panel
- 1.3 Method 3 – Reinstall Nvidia Control Panel from Microsoft Store
- 1.4 Method 4 – Unhide NVIDIA Control Panel
- 1.5 Method 5 – NVIDIA Support
- 1.6 Method 6 – Update NVIDIA Graphics Driver
- 1.7 Method 7 – Reinstall NVIDIA Graphics Driver
- 2 Conclusion
How to Fix NVIDIA Display Settings are Not Available
The various solutions which will help you in fixing this issue will be discussed in this article. We suggest you try each fix step-by-step rather than skipping any of the fixes in between.

Method 1 – Restart NVIDIA Services
Restarting the NVIDIA services might help you in solving the issue. Don’t think us fool. It has proved to be a magical solution for numerous users.
Hence, you can also try restarting the NVIDIA specific services in case you are not able to see NVIDIA Control Panel in the System Tray or Desktop context menu. You can follow the following steps to get rid of this issue.
Step 1 – First of all, press the Windows and R keys simultaneously to open the Run box.
Step 2 – What you need to do next is to type services.msc in it.
Step 3 – Now, press the Enter button to open the Services window.
Step 4 – Once it is opened, search and select each service having NVIDIA in its name.
Step 5 – Finally, press the Restart button, which is present on the left side of the screen.
Important: Did it open any of the services? In case nothing appears select Start after right-clicking on it. Else if it displays an Error 14109 on the screen stating with a message saying that Nvidia Display Container Service cannot be opened by Windows, then the below-mentioned steps could be followed.
Step 1 – First of all, go to the bottom-left corner of your screen and right-click on the Start.
Step 2 – Now, open the Device Manager by selecting it.
Step 3 – Then, search and select Display Adaptors.
Step 4 – Further, you need to uninstall the NVIDIA driver by right-clicking on it.
Step 5 – Finally, the PC needs to be rebooted.
Inspect if the issue forthcoming has been rectified after rebooting the PC. In case it fails to solve the issue, step-up to another Fix.
Read Also:
Method 2 – Manually Launch NVIDIA Control Panel
Don’t you want a permanent solution to get rid of this issue? Then, we have a temporary solution for you, too in which you need to manually launch the NVIDIA Control Panel on your PC. What you need to do to manually launch and create its desktop shortcut is described in the following steps.
Step 1 – First of all, go to This PC in your Windows 10.
Step 2 – Now, select Program Files after opening your C drive.
Step 3 – Then, choose NVIDIA Corporation from the list of options available.
Step 4 – Further, search and select Display.NvContainer.
Important: Are you not able to find the NVIDIA folder in the Program Files? Then, we suggest you search for it in the Program Files (x86) folder.
Step 1 – Once it is opened, choose Control panel Client.
Step 2 – What you need to do next is to right-click on nvcplui file after selecting it.
Step 3 – Later on, select Run as administrator.
Step 4 – Finally, choose Desktop Shortcut after right-clicking on nvcplui file.
If your error has not been resolved till now, we suggest you try Fix 3.
Method 3 – Reinstall Nvidia Control Panel from Microsoft Store
As reported by numerous users, this issue gets solved when they re-installed the Nvidia Control panel app. But it needs to be downloaded from Microsoft Store rather than from the browser. Similar can be the case with your PC too. You can follow certain steps for re-installing it.
Step 1 – First of all, go to the Windows menu icon, which is present on the bottom-left of your screen.
Step 2 – After this, choose Settings.
Step 3 – Now, select Apps from various options available.
Step 4 – Then, you need to choose Apps & Features, which can be found on the left panel.
Step 5 – Further, go to the search bar and type Nvidia Control panel.
Step 6 – Moreover, uninstall it if anything gets displayed on the screen.
Step 7 – Later on, open the Microsoft Store on your PC.
Step 8 – Next, type the Nvidia Control panel in the search bar.
Step 9 – Finally, install the Nvidia Control panel, which is displayed on the screen.
Examine if the issue has been sorted out. In case it not, step-up to Fix 4.
Method 4 – Unhide NVIDIA Control Panel
Have you recently updated the NVIDIA graphics card software on your PC? There occurs a situation of hiding of NVIDIA Control Panel when the NVIDIA graphics card software gets updated.
Now the question arises, how will you get to know if it is hidden or not? To know if it is hidden or not, just go to Start Menu and type there NVIDIA Control Panel. If you get anything in the result, then it is not hidden else, it is hidden. Thus, in case if it is hidden, it is crucial to unhide it. Certain steps will help you in unhiding it.
Step 1 – First of all, press the Windows and R keys simultaneously to open the Run box.
Step 2 – Once it is opened, type Control there.
Step 3 – Now, press the Enter button to open the Control Panel.
Step 4 – Then, go to view and select Large icons.
Step 5 – Further, search for NVIDIA Control Panel option and double-click on it.
Step 6 – Moreover, search and select either for Desktop or View menu from the list of options available.
Step 7 – Finally, return to the Desktop after choosing the Add Desktop Context Menu.
Check if the issue facing has been resolved. If not, we suggest you try Fix 5.
Method 5 – NVIDIA Support
Is your issue solved temporarily through one of the fixes given above? But, later on, the issue appeared again? Then, you can try this fix provided by NVIDIA support to get rid of this issue. The following steps will help you in getting the issue solved.
Step 1 – First of all, go to This PC in your Windows 10.
Step 2 – Now, select Program Files (x86) after opening your C drive.
Step 3 – Then, choose NVIDIA Corporation from the list of options available.
Step 4 – Further, search and select Display.NvContainer.
Important: Are you not able to find the NVIDIA folder in the Program Files (x86)? Then, we suggest you search for it in the Program Files folder.
Step 1 – Once it is opened, search for a file NvContainer.
Step 2 – Later on, select Copy after right-clicking on it.
Step 3 – Moreover, open the Run box again by pressing Windows and ‘R’ keys simultaneously.
Step 4 – What you need to do next is to type shell:startup in it.
Step 5 – Next, press the Enter button to open the Startup Folder.
Step 6 – Once it is opened, select paste after right-clicking on it. It will paste the content which you earlier copied.
Step 7 – Now, go to properties after right-clicking on the file you pasted now.
Step 8 – Further, select Run this program as administrator after choosing the Compatibility tab.
Step 9 – Finally, finalize the settings by pressing the OK button.
Once you are done with all the above-mentioned steps, reboot your PC. This will bring the NVIDIA Control Panel back on the system tray of your PC or desktop context menu. If NVIDIA display settings have not been fixed even by this fix, try out using another Fix, i.e., Fix 6.
Method 6 – Update NVIDIA Graphics Driver
Do you know that the issue can also be caused if the NVIDIA Graphics Driver is not updated? Thus, it is mandatory to keep the drivers updated on your PC to avoid such problems. In such circumstances, you need to open the Device Manager and get your NVIDIA Graphics Driver updated. Certain steps could be followed to update it.
Step 1 – First of all, open the Windows menu by pressing the Windows and ‘X’ keys simultaneously.
Step 2 – Once the menu is opened, select Device Manager.
Step 3 – Now, choose Display adapters from the various options available.
Step 4 – Then, right-click on the NVIDIA graphics card driver after searching it.
Step 5 – What you need to do next is to select the Update driver.
Step 6 – Finally, select Search automatically for updated driver software. In case it finds that an update needs to be downloaded, it will automatically install it; else, the pop-up showing no update available would be displayed on the screen.
Is the NVIDIA settings issue fixed now? If not, we recommend you try Fix 7, which will definitely solve your problem.
Method 7 – Reinstall NVIDIA Graphics Driver
Is your problem not solved by any one of the fixes given above? Then, the ultimatum option left in such a case is to re-install the NVIDIA graphics driver. But before reinstalling it, you first need to uninstall it. Don’t know how to uninstall and re-install it? Just follow the respective steps.
Step 1 – First of all, press the Windows and ‘X’ keys simultaneously to open the Device Manager.
Step 2 – Now, choose the Device manager among the various options available.
Step 3 – What you need to do next is to select Display adapters.
Step 4 – Then, choose the Uninstall device after right-clicking on the NVIDIA Graphics Card driver.
Step 5 – Once the driver is uninstalled, open the official webpage of NVIDIA – Download Drivers.
Step 6 – Later on, you need to go to certain drop-down menus and select the relevant Product Type, Product Series, and Product options.
Important: You show know the configuration of your PC to download the latest driver.
Step 7 – Moreover, install it on your PC by following the on-screen commands.
Step 8 – Finally, the PC needs to be rebooted.
Check if you can see the NVIDIA Control Panel in the system tray of your PC and Desktop context menu. The issue would be resolved for sure if you followed all the above steps fruitfully.
Read Also:
Conclusion
We hope that the above-mentioned methods might have solved your issue. In most cases, the error gets solved either by unhiding the NVIDIA Control Panel or using a permanent solution of the NVIDIA control panel. However, if this is not the case, the above-mentioned methods will definitely solve your problem.


