Error 0x80070570 is one of the common error which occurs when we update our existing Windows or install a new Microsoft for the system. Windows 7 is efficiently handled by the users and it a user-friendly version of the Windows Operating System by Microsoft.
Hence, users prefer to update it or install it. But installing or updating is the invitation to the errors like 0x80070570. We should fix the errors so they don’t affect the performance of your system. All the reasons and solution for the Error 0x80070570 is provided below.

Error 0x80070570 is likely to occur when we install a new Microsoft update or while updating existing Windows in the system. 0x80070570 Error pops in the installation process and halts the installation process.
0x80070570 Error even occurs when we move files from one drive to another. Error 0x80070570 is triggered if the system has a corrupted file or if any file is missing. Faulty drives or damaged files cause Error 0x80070570 to appear.
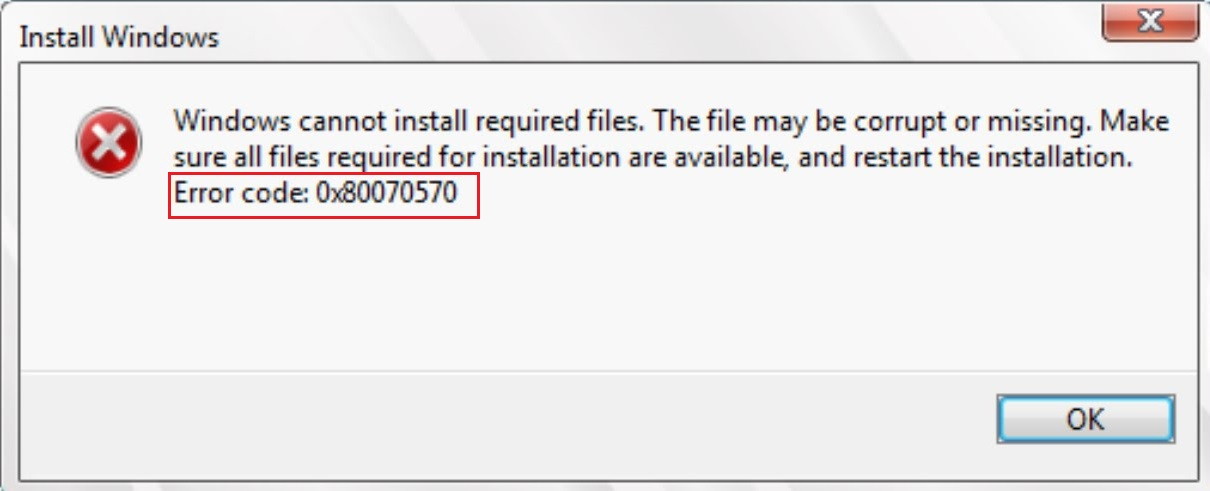
There is a certain message which reads when the error occurs that “Windows cannot install the required file. The file may be corrupted or missing. Check whether all the files required for installation are available and restart the installation. Error code: 0x80070570.”
Read Also:
Contents
Cause of 0x80070570 Error
The certain files or settings which are required for windows installation CDs, your computer is unable to fulfil that request. Maybe, the installation disk is corrupted or has invalid permission to the files.
Due to an error in registry settings the application is unable to detect the location of the files which are required for the installation process. It may fail to detect even if it has registry files corrupted or go missing.
Deleted files are placed in the RECYCLE BIN. But, the system is unable to detect them. Or, the user moved the certain files in the location in which the system is not allowed to search.
These have built-in drivers, The Serial Advanced Technology Attachment (SATA) Drivers which are incorrectly recognized by the system in the installation process, while BOIS on your computer is set with RAID Autodetect/AHCI.
If your computer is affected by a virus it will block operations to your PC. When your browser webpage, compose an email, download something from the Internet, etc. it leads to an invitation to the virus. Once the virus enters your system it will steal information, attack files and even delete data.
How to Fix Windows Error Code 0x80070570
After, knowing the reasons for this error, we can proceed to fix the problem. So, below are the different methods and steps to fix the Error Code 0x80070570.
Type 1 – Windows 7 Installation Error Code 0x80070570
This is the first type of the Error Code 0x80070570 is the Windows 7 installation problem. There are 4 different kinds of methods to solve the error, go through the methods which are described below.
Method 1 – Stop 0x80070570 Error
The 0x80070570 error can be caused due to corrupted ISO files, corrupted USB drive, faulty or damaged CD/DVD drive. If you are trying to install Windows using a USB drive, then make sure to use a new USB drive which consists of the latest ISO file. If you’re opting for CD, then try and use the burn with a copy of Windows and Microsoft products which has a valid license key.
It is advised that if you’re burning the data to CD then, burn it at the low speed., if faster is the speed of burning more errors are likely to occur. And make that the disk which you’re using should be of good quality and avoid using low-quality ones or older CDs because they may lead to more errors.
Method 2 – Retry Windows Installation
Windows installation may fail due to corrupted drivers, problems with the program. Unfortunately, if the error persists even after using the perfectly well USB Drive or CD, you can try reinstalling Windows.
So, it is recommended to use the latest ISO file, and before installing the Windows again, the BIOS should be updated to the newest version. Click on the Install Now button at the Installation Wizard to initiate the installation process.
If you find the error again, cancel the process of installation by clicking on the Cancel button and then, hit on the Install Now button again. After doing this, Windows would be installed again and there is no need to perform the reboot.
Method 3 – Running Chkdsk in Windows RE
Running CHKDSK in Windows 10 using Command Prompt.
Step 1 – Open or log into your Windows 10
Step 2 – Press Windows key. It will open the Start Menu.
Step 3 – In the Start menu, search for Command Prompt in your search box.
Step 2 – Then, right-click on the command prompt and choose Run as administrator option.
Step 3 – The Command Prompt will open up in the administrator mode. Type the following command in the command prompt “chkdsk/f/r”, and hit enter.
Step 4 – Now, choose Y to restart your computer.
Running CHKDSK in Windows 10 using the installation disc
Step 1 – Set up your installation disc. Insert disc.
Step 2 – After inserting the disc, reboot your computer.
Step 3 – It will ask you to press any key, so press the random key to run Windows installation.
Step 4 – Choose time and language and hit Next.
Step 5 – Then, select Repair your computer situated at the down left corner.
Step 6 – Choose an option screen that will be displayed, select Troubleshoot.
Step 7 – Search for command prompt in your Start Menu, choose the command prompt.
Step 8 – Then, right-click on the command prompt and choose Run as administrator option.
Step 9 – The Command Prompt will open up in the administrator mode. Now, type the given command in the command prompt “chkdsk/f/r”, and hit enter.
Step 10 – Now, choose Y to restart your computer.
Method 4 – Changing the BIOS Settings
BIOS helps in changing data and time of the system. Error 0x80070570 might be an occurring cause of improper settings of BIOS. Although BIOS is tied to a computer hence, its settings differ from computer to computer depending upon the manufacturer.
Step 1 – Firstly, you should Boot the computer into BIOS. Till the time the computer is into its booting of system, you can view prompt information on the screen, the screen shows how to enter BIOS by pressing a specific key from the keyboard, and F2 is the given key. The given key differs from computer to computer to enter BIOS, so, please read instructions carefully and press the correct key.
Step 2 – Navigate to the Drives option and choose the SATA option. There are some changes you’re required to do. Something was written as “RAID Autodetect-AHCI,” so change it to “RAID Auto detect-ATA.” Then, you can save the changes.
Step 3 – Now, you can Exit BIOS and try again to install Windows.
Method 5 – Cleaning the Registry
The registry is the place where all your hardware and software entries lie and your system settings. Cleaning your Registry boosts the performance of the computer. Messing with the registry is quite risky as if it may delete your necessary files. Registry stores all your computers important details.
Step 1 – Install Registry Cleaner app in your computer and select ‘Custom Install (Advanced)’ during the setup process and untick ‘Install Auslogics BoostSpeed’ to ensure that it’s not installed alongside with Registry Cleaner itself.
Step 2 – Then type ‘system’ into the Search box and select on ‘Create a restore point’. Make sure that System Restore is switched on for drive C (choose it and click on ‘Configure’ if not), then click ‘Create‘ Give the Restore point a suitable name and click ‘Create’ again to set up a fail-safe backup which you can restore should it prove necessary.
Step 3 – Jump back to Auslogics Registry Cleaner, open settings to verify ‘Back Up Changes’ is ticked. The left-hand panel shows which of the files are selected for scanning in Registry, right-click on this column and choose ‘Check Safe Only’ to ensure only safe areas are ticked for now. When it is done hit the ‘Scan Now’ button and wait till the scan is completed.
Step 4 – The problems will be displayed. By clicking ‘Repair’ all the problems will be removed. Then, click ‘Repair’ and reboot and analyze to see if the problem has disappeared. If the problems still emerge restore the backup which is mentioned in step 7.
Step 5 – Now, cautiously select the files you want to delete. Make sure verify ‘Back Up Changes’ is ticked, then click ‘Repair’ to remove only those entries you’ve selected.
Step 6 – Select,
- View
- Find Registry Keys
To examine the registry keys and delete them. You should use the ‘Filter’ button before clicking the ‘Search’ to restrict your search. Manually select entries to delete, Then, hit ‘Clean up’.
Step 7 – Now select,
- File
- Rescue Center
For browsing available backups and Restore points. Restore and click Yes to restore all deleted entries from that backup. In case that fails, select ‘Restore Points’ and your System Restore file.
Type 2 – Windows Update KB3116908 Failed to Install Error 0x80070570
0x80070570 error occurs for updating Windows 10 which came out recently but unfortunately, users cannot complete it. If this error occurs while we try to install an update, perform the following steps.
Step 1 – Navigate to my computer and open C drive and go through the following paths;
- Windows
- SoftwareDistribution
- Download
If you find difficulty in following paths then you can directly search the given command in your search box for reaching that window: “C:\Windows\SoftwareDistribution\Download”
Step 2 – Once reaching the required window, you can delete the folder, but, you are only allowed to delete the folder if you’re in administrator mode.
Step 3 – You can restart your computer now and try to install the updates again.
Type 3 – Error 0x80070570: The File or Directory is Corrupted and Unreadable
There might be many reasons for Error 0x80070570 to occur, but one of the reasons for the error 0x80070570 to occur is while deleting data or transferring data. The below-mentioned methods will help you to solve error which occurs due to corrupt files, outdated drivers, and recovering lost data. Go through the following methods and steps to solve the error 0x80070570.
Method 1 – Scan for Virus
If your file gets attacked by the virus it leads to faults in your data. The computer consists of important information and lots of files. Hence, we should frequently keep scanning our computer for avoiding the virus. Antivirus software will help you scanning threats and removing them. Below steps will help you to scan your entire computer for viruses:
Step 1 – Navigate to the place where located your Antivirus software.
Step 2 – Antivirus interface will be displayed.
Step 3 – Then, click on scan now option
Step 4 – It will display the types of scanning options, choose the scanning option accordingly.
Step 5 – Scanning process for the virus will begin once you hit the start button.
Step 6 – As you finished scanning, it will display all the threats. Check whether the threats detected are an actual threat and not a virus.
Step 7 – Delete the real threats and restart your computer.
Method 2 – Checking for the Drivers Installed and Updating Drivers
Having updated drivers is very efficient to work smoothly. Hence, Drivers play an important role in the operations which are about to perform in the system. So, drivers should be updated from time to time.
Step 1 – Firstly, go to My Computer and click on the properties option.
Step 2 – On the left part of the Window device manager will be opened, click on device manager.
Step 3 – Check all the drivers are working properly or not.
Step 4 – Then, if you find any problem in the drivers, click on the Update Driver option and fix it.
Method 3 – Defragmenting the Hard Disk
Defragmentation will ease your load by separating the data and making all the parts of the drive easily accessible. Here are steps to defragment the hard disk.
Step 1 – Search for Control Panel in the search box and open it.
Step 2 – Once Control Panel is opened, click on System and Security option.
Step 3 – In that, select on Defragment your hard drive option.
Step 4 – A Defragmenter window will open up. Hit on the Analyse Disk button to start checking if defragmenting is required.
Step 5 – If there is a need for Defragment then click on the Defragment Disk button.
Method 4 – Recovery of Data
This is the last method to try if you lost the hopes of all the above methods. Recovery of data is done when you mistakenly delete data from your device. The required data must be lying in those partitions which is inaccessible. So, try to recover your data so there won’t be much less.
Step 1 – Open the software so we can perform recovery.
Step 2 – Click on the corresponding button to choose the recovery mode.
Step 3 – Click on the partition which will have your necessary file. Now, hit on the Next button. Wait till it completes the process.
Step 4 – It will display all the files that are inaccessible on the partition.
Step 5 – By clicking on the Recovery button recover your required files.
Don’t Miss:
- Windows 10 Update Error Code 0x8024a105
- ERR_EMPTY_RESPONSE or No Data Received Error in Chrome
- What is idp.generic? | A Virus, Should You Ignore It?
- ERR_CACHE_MISS in Google Chrome
Conclusion
Well, this was the detailed steps and methods to solve the error 0x80070570. Carefully read the instructions according to your problem execute them then, you’re good to go without any issue.


