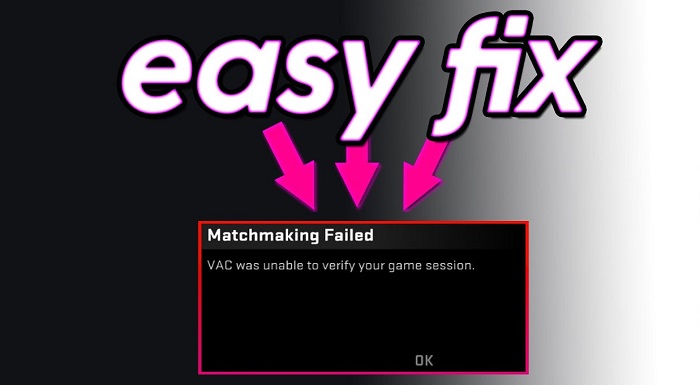
VAC Was Unable to Verify the Game Session error is mostly seen in the game CS: GO where players unable to play any matches and queue for matchmaking. VAC detects the files which give undesired results for players in matchmaking.

VAC Was Unable to Verify the Game Session may not be a human error unless you have done something wrong, so don’t worry. There are sometimes system error, which is leading to VAC was unable to verify the game session.
Read More Posts:
- Widevine Content Decryption Module
- Your Windows License Will Expire Soon
- Steam Content File locked Error on Steam
Contents
Methods to Fix VAC Unable to Verify the Game Session Error
5 methods to fix VAC Was Unable to Verify the Game Session Error. These methods are given below. Keep reading!
Method 1 – Reboot Your Computer
Rebooting your system is the efficient and reliable way to solve VAC was unable to verify the game session error.
Step 1 – Click on the Windows key on your keyboard or go to the taskbar and click on the Start Menu and select on the reboot or restart option. Before rebooting your computer, close all your working programs.
Step 2 – when you finished rebooting open your game and see if you can connect to your game session.
Method 2 – Log Out of Steam and Log in Again
Logging out and logging in again is the best solution rather than reinstalling the Steam. Because reinstalling Steam doesn’t provide you with satisfactory results, in fact, it loads the same settings which was installed in your previous Steam and didn’t rectify your error at all. Whereas logging in and logging off provides you with effective results, and it is highly recommended.
Step 1 – Search for Steam in the Start Menu or Search where you saved your Steam. C:\Program Files (x86)\Steam is the default location of the steam. Open the Steam
Step 2 – Go to the title bar and click on your profile situated at the top. A drop-down menu appears you will notice Log out option at the end click on it and, you have successfully logged out of your account.
Step 3 – Login in again with the correct Username and password.
Step 4 – This will most efficiently fix your VAC was unable to verify the game session error if it is due to some bad configuration or settings files.
Method 3 – Verify Integrity of The Game Files
This problem may occur if your game files are corrupt or some game files are missing. Due to this, you are not able to connect to your game. Verifying integrity of the data will fix VAC service not being able to check the game files. The following are the steps to verify the integrity of the game files.
Step 1 – Launch your Steam client. Click on “Settings” which is situated on the upper left corner of the client.
Step 2 – Search “Download” options. Click on Steam Library Folders situated at the top
Step 3 – It displays the locations where your Steam is installed in your system. Right-click on it and click on Repair Steam Library.
Step 4 – Go through the library section and right-click on the game and select the game you are facing the VAC was unable to verify the game session error in, and go to properties.
Step 4 – Select on its properties and open the tab with local files.
Step 5 – Click on the verify integrity of game cache files button and Check whether the VAC was unable to verify the game session error is solve or not.
Step 6 – Once, changes are done, restart your Steam and check if the error is fixed.
Method 4 – Exclude Game Directory from Antivirus Scan
Antivirus Scan is one of the easiest ways to avoid VAC service not being able to verify the game files. Because antivirus scan tries to scan the game directory in the background, which leads to VAC service not being able to check the game files. Well, you can just remove the game directory from getting scanned.
Step 1 – Open Windows Defender Security Centre on your system.
Step 2 – On the popped up window, select Virus and threat protection option.
Step 3 – Then, under Exclusions, click the Add or remove exclusions option from the mentioned option.
Step 4 – Choose the game directory which you want to exclude from antivirus scan such as:
- File —It takes out only one file per exclusion.
- Folder —It removes a folder and its content, including sub-folders.
- File type — Instead of removing files and folder locations, you can just configure the antivirus to ignore files with a specific extension no matter where the location is.
- Process —It excludes background processes by name.
Step 5 – Go through with the on-screen directions to add the new exclusion depending on your selection. For example, if you select File, just browse and pick the file you want to exclude. If you choose File type option, then you only need to enter the extension of the file format which you do not wish to scan.
Step 6 – Wait till the process completes its exclusion. Once, done with excluding game directory check you whether the error persists.
You can remove an exclusion using the same instructions as per your wish, but on step No. 5, be careful and without fail, select the item and click the Remove button.
Method 5 – Repair the Steam Client
One of the reasons for VAC service not being able to verify the game files is Steam Client. There must be damaged files, or some data may have broken, which is giving the error so, the solution is repairing the Steam Client. The following steps will help you to repair the steam client.
Step 1 – Press Windows Key + R on the keyboard.
Step 2 – You will notice the dialogue box appearing, type “cmd” command in the dialogue box. Command Prompt window will open up.
Step 3 – Type the required command given below in the following command prompt C:\Program Files (x86)\Steam\bin\SteamService.exe /repair or Locate to the place where you saved your steam.
Step 4 – Wait until the repair is complete and restart your computer.
Step 5 – After restarting your computer open Steam and check if the “VAC was unable to verify the game session” error is solved or not.
Also Read:
- Confirm Form Resubmission
- VIDEO_TDR_FAILURE (nvlddmkm.sys) BSOD
- Modern Setup Host Has Stopped Working in Windows 10
- Steam Missing File Privileges Error in Steam
Conclusion
Hopefully, these 5 methods will help you solve the VAC was unable to verify the game session error. Using any of the methods, you will get back to continue your game without any error.


